


March 26, 2026
•
21
min read

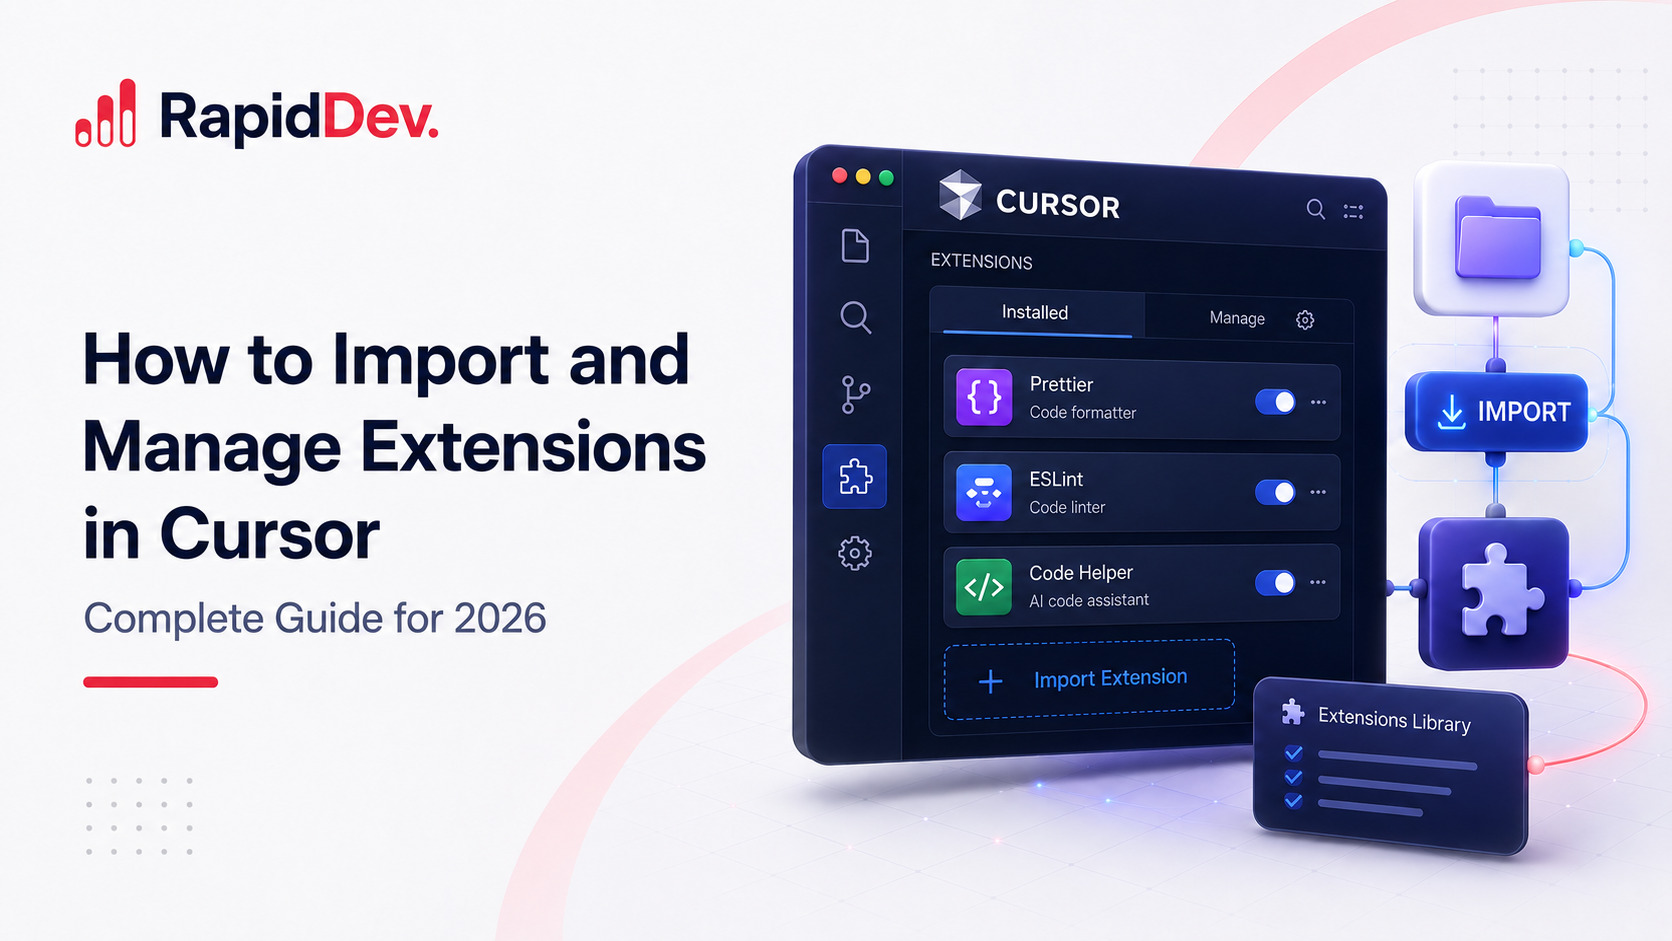
How to Import and Manage Extensions in Cursor: Complete Guide for 2026
Learn how to import and manage Cursor extensions with 4 proven methods. Covers one-click import, VSIX install, CLI commands, syncing, and troubleshooting.
Cursor is a VS Code fork, which means your favorite extensions likely work right out of the box. However, many developers struggle with importing their existing setup and understanding recent marketplace changes. The June 2025 transition to OpenVSX created confusion that still affects users today.
Managing Cursor extensions effectively can transform your coding experience. With the right setup, you'll have access to powerful tools for linting, formatting, debugging, and version control. However, without proper guidance, you might miss essential features or install conflicting extensions.
This guide covers every method to import, install, and manage Cursor extensions. Whether you're migrating from VS Code or setting up a fresh installation, you'll find step-by-step instructions for each approach. Additionally, you'll learn how to troubleshoot common problems and sync your extensions across multiple devices.
By the end, you'll have complete control over your Cursor extension setup. Let's start with a quick reference, then dive into the details.
TL;DR: Quick Cursor Extensions Reference Guide
Need the essentials fast? Here's your cheat sheet for installing and managing Cursor extensions quickly.
One-click import: Open Cursor Settings (Cmd/Ctrl + Shift + J) → General → Account → Click "Import from VS Code"
Marketplace install: Press Ctrl+Shift+X → Search for extension → Click Install
VSIX install: Press Ctrl+Shift+P → Type "Extensions: Install from VSIX" → Select file
CLI install: Run cursor --install-extension <extension-id> in terminal
Extension locations by platform:
Operating SystemExtensions FolderWindows%APPDATA%\Cursor\extensions\macOS~/.cursor/extensions/Linux~/.cursor/extensions/
Now let's explore each method in detail.
Understanding the Cursor Extensions System and Marketplace
Before diving into installation methods, it helps to understand how Cursor handles extensions. This knowledge will save you troubleshooting time later and help you make better decisions about which Cursor extensions to install.
Cursor as a VS Code Fork
Cursor builds on the same codebase as Visual Studio Code. As a result, it supports the same extension format and API. Approximately 90% of VS Code extensions work seamlessly in Cursor without any modifications.
This compatibility exists because Cursor maintains the same extension host architecture. Your existing extensions for linting, formatting, language support, and Git integration will typically work immediately.
The OpenVSX Transition
In June 2025, Cursor transitioned from the VS Code Marketplace to the OpenVSX Registry. This change happened because Microsoft's terms restrict VS Code Marketplace access to Microsoft products only.
Here's what this means for you:
First, some extensions may appear missing from Cursor's marketplace. Microsoft-proprietary extensions like certain Azure tools won't be available directly.
Second, Anysphere (Cursor's parent company) now publishes maintained versions of popular extensions. Look for the "Anysphere" publisher name when searching for common tools like Python or C++ support.
Third, you can still install most extensions manually via VSIX files. This workaround handles most cases where marketplace availability falls short.
Cursor 3.0 Changes (April 2026)
Cursor 3.0 launched in April 2026 with significant changes to extension and plugin management. The new "Agents Window" interface brings a fresh approach to working with AI agents across multiple repositories.
Key changes affecting Cursor extensions include:
Plugin imports default to OFF for Enterprises. If you're on an Enterprise plan, third-party plugin imports are now disabled by default. Admins must explicitly enable them through team settings.
One-click plugin installation. The new plugin marketplace lets you browse hundreds of plugins and install them with a single click. You can also set up private team marketplaces for custom plugins.
MCP Apps support structured content. Model Context Protocol integrations now deliver richer tool outputs, expanding what Cursor extensions and plugins can accomplish.
To access the new Agents Window, press Cmd+Shift+P and type "Agents Window." You can switch between the new interface and the traditional IDE at any time.
Extensions vs Cursor Plugins
Cursor now offers two types of add-ons. Traditional extensions work like VS Code extensions. They add language support, linting, themes, and similar features.
Cursor Plugins represent a newer category. These integrate with external services like Atlassian, Datadog, GitLab, and Stripe. You'll find these in the Cursor Marketplace launched in March 2026.
To install a Cursor Plugin:
- Open the Command Palette (Cmd/Ctrl+Shift+P)
- Type "Cursor: Open Plugin Marketplace"
- Browse or search for your desired plugin
- Click Install and authorize any required permissions
Plugins differ from extensions because they connect to external APIs and services. They often require authentication with third-party accounts.
MCP Integration for Extended Functionality
Model Context Protocol (MCP) represents Cursor's approach to extensibility beyond traditional extensions. MCP servers add capabilities like database access, API integrations, and custom skills.
You can install MCP servers through the plugin marketplace or configure them manually in your settings. Popular MCP integrations include:
- Database connectors for PostgreSQL, MySQL, and MongoDB
- API integrations for Jira, Linear, and GitHub
- Custom skills for specific frameworks and workflows
MCP extends what Cursor extensions can do by providing structured data and tool access to the AI agent. This makes the AI more capable when working with your specific technology stack.
For this guide, we focus primarily on traditional extensions since they cover most developer needs. However, understanding the plugin and MCP ecosystem helps you maximize Cursor's capabilities.
Method 1: Import VS Code Extensions to Cursor with One Click
The easiest way to migrate your Cursor extensions involves the built-in import feature. This method works best when VS Code is installed on the same machine and you want to transfer your entire setup quickly.
Prerequisites
Before starting, ensure you have VS Code installed with your desired extensions. Cursor needs to detect this installation to offer the import option.
Step-by-Step Instructions
Step 1: Launch Cursor on your computer.
Step 2: Open Cursor Settings using the keyboard shortcut Cmd+Shift+J (Mac) or Ctrl+Shift+J (Windows/Linux).
Step 3: Navigate to the General section in the left sidebar.
Step 4: Look for the Account subsection.
Step 5: Click the "Import from VS Code" button.
Step 6: Wait while Cursor scans and imports your extensions. This process may take several minutes depending on how many extensions you have.
Step 7: Restart Cursor to ensure all extensions load properly.
What Gets Imported
The one-click import transfers several items from your VS Code setup:
- All installed extensions (enabled and disabled)
- Your settings.json configuration file
- Custom keybindings from keybindings.json
- Installed themes and icon packs
- Snippets you've created
Known Issues with One-Click Import
While convenient, this method has some quirks. Extensions that were disabled in VS Code may become enabled in Cursor. You'll need to manually disable these after import.
Additionally, Microsoft-proprietary extensions won't function even if they appear installed. Examples include certain Azure and Live Share extensions.
Some extension settings require reconfiguration. API keys, authentication tokens, and service connections typically need fresh setup.
Keybinding Conflicts After Migration
One common frustration involves keyboard shortcuts. In VS Code, Cmd+K serves as a chord prefix for many commands. In Cursor, Cmd+K triggers the AI "Generate Code" feature instead.
To resolve keybinding conflicts:
- Open Keyboard Shortcuts (Cmd/Ctrl+K, Cmd/Ctrl+S)
- Search for the conflicting command
- Right-click and select "Change Keybinding"
- Assign a new shortcut that doesn't conflict
If you prefer the VS Code behavior, search for "Cursor: Open Chat" in Keyboard Shortcuts and rebind it to Cmd+L or Cmd+Shift+K. However, most developers adapt to Cursor's AI-first shortcuts after a few days.
Token and Authentication Migration
GitHub, GitLab, and other service tokens often don't migrate securely between editors. After importing your Cursor extensions, you may need to re-authenticate.
To fix authentication issues:
- Sign out of the affected service within Cursor
- Sign back in with fresh credentials
- Regenerate Personal Access Tokens (PAT) if you use private package registries
- Update any tokens stored in environment variables or .env files
Method 2: Install Extensions in Cursor from the Marketplace
The Cursor extension marketplace provides the most straightforward way to discover and install extensions in Cursor. You can browse, search, and install with just a few clicks.
Opening the Extensions Panel
You have three options to access the Extensions view:
Keyboard shortcut: Press Ctrl+Shift+X on Windows/Linux or Cmd+Shift+X on Mac.
Activity Bar: Click the Extensions icon in the left sidebar. It looks like four squares with one detached.
Menu navigation: Go to View → Extensions from the top menu.
Searching for Extensions
The search bar at the top of the Extensions panel accepts several query types. You can search by extension name, publisher, or category.
For example, searching "Python" shows all Python-related extensions. Searching "@publisher:Anysphere" shows only Anysphere-maintained extensions.
Installing Extensions
Once you find your desired extension, click the blue Install button. Cursor downloads and activates the extension automatically. Some extensions require a window reload, which Cursor will prompt you to do.
After installation, the button changes to show Uninstall and Disable options.
Finding Anysphere-Published Extensions
Since the OpenVSX transition, Anysphere publishes maintained versions of popular extensions. These typically work better with Cursor than third-party alternatives.
Look for "Anysphere" as the publisher name. Common Anysphere extensions include Python support, C/C++ tools, and Dev Containers functionality.
When multiple versions of an extension exist, prefer the Anysphere version for best compatibility.
Method 3: Cursor VSIX Install for Extensions Not in Marketplace
Sometimes you need an extension that isn't available in the Cursor extension marketplace. The Cursor VSIX install method solves this problem. A VSIX file is simply a packaged VS Code extension that you can install manually.
When to Use VSIX Installation
Consider VSIX installation in these situations:
- The extension doesn't appear in Cursor's marketplace
- You need a specific older version
- The extension exists only on GitHub
- Microsoft removed the extension from accessible marketplaces
Getting VSIX Files
You have several options to obtain VSIX files.
From GitHub Releases: Most open-source extensions publish VSIX files on their GitHub Releases page. Visit the repository, click Releases, and download the .vsix file.
From VS Code (if installed): Open the extension in VS Code, click the gear icon, and select "Install Another Version." Some versions offer direct download.
Building from source: Clone the extension repository, run npm install to get dependencies, then run npx vsce package to create the VSIX file.
Note that Microsoft removed the direct "Download Extension" button from the VS Code Marketplace in early 2025. The workarounds above handle this limitation.
Installing VSIX in Cursor: Three Methods
Method A: Command Palette
This approach works reliably across all platforms.
- Press Ctrl+Shift+P (Windows/Linux) or Cmd+Shift+P (Mac)
- Type "Extensions: Install from VSIX"
- Select this option from the dropdown
- Navigate to your downloaded .vsix file
- Click Install and wait for completion
- Restart Cursor if prompted
Method B: Drag and Drop
For a quicker approach, open the Extensions panel and drag your .vsix file directly into it. Cursor recognizes the file and begins installation.
Method C: CLI Installation
From your terminal, run the following command:
bash
cursor --install-extension /path/to/your/extension.vsix
Replace the path with your actual file location. This method works well for scripting and automation.
Handling Installation Errors
If VSIX installation fails, check these common causes:
- The extension requires a newer Cursor version
- Dependencies are missing from the package
- The VSIX file is corrupted (try re-downloading)
- File permissions prevent installation
For persistent issues, check the extension's GitHub issues page. Others may have encountered and solved the same problem.
Method 4: CLI Commands for Cursor Extensions Management
Command-line tools offer powerful options for managing Cursor extensions efficiently. They're especially useful for automation, scripting, and managing extensions across multiple machines.
Setting Up the Cursor CLI
First, ensure the Cursor command is available in your terminal.
- Open Cursor
- Press Ctrl+Shift+P (or Cmd+Shift+P on Mac)
- Type "Shell Command: Install 'cursor' command in PATH"
- Select this option and confirm
Verify the installation by running cursor --version in your terminal.
Essential CLI Commands
Install an extension by ID:
bash
cursor --install-extension publisher.extension-name
Install from a VSIX file:
bash
cursor --install-extension /path/to/extension.vsix
List all installed extensions:
bash
cursor --list-extensions
Uninstall an extension:
bash
cursor --uninstall-extension publisher.extension-name
Launch Cursor with all extensions disabled:
bash
cursor --disable-extensions
Finding Extension IDs
Every extension has a unique identifier in the format publisher.extension-name. You can find this ID in several ways.
In the marketplace, the extension ID appears in the URL and on the extension's detail page. For example, the Python extension ID is ms-python.python or anysphere.python for the Anysphere version.
Bulk Operations with CLI
The CLI enables efficient bulk operations. Export your current extensions to a file:
bash
cursor --list-extensions > my-extensions.txt
Then install all extensions from this list on another machine:
bash
cat my-extensions.txt | xargs -L 1 cursor --install-extension
This approach simplifies setting up consistent environments across multiple computers.
How to Manage Cursor Extensions: Enable, Disable, Update, and Remove
Installing extensions is just the beginning. Learning to manage Cursor extensions properly keeps your editor fast and your workflow smooth. Here's everything you need to know about ongoing extension management.
Viewing Installed Extensions
Open the Extensions panel and click "Installed" in the filter dropdown. This view shows all extensions currently on your system, organized by enabled and disabled status.
Enabling and Disabling Extensions
Right-click any extension to see management options. Choose "Disable" to turn off an extension without uninstalling it. This option proves useful for troubleshooting or temporarily removing functionality.
You can also disable extensions for specific workspaces only. This setting helps when certain extensions conflict with particular projects.
Uninstalling Extensions
To remove an extension completely, right-click and select "Uninstall." Alternatively, use the CLI command:
bash
cursor --uninstall-extension publisher.extension-name
Cursor removes the extension files and cleans up related settings.
Updating Extensions
By default, Cursor updates extensions automatically. However, you can manage updates manually through the Extensions panel.
Click the gear icon next to any extension to see available updates. You can also disable automatic updates in Settings if you prefer controlling update timing.
Configuring Extension Settings
Most extensions offer customization options. Access these through Settings (Ctrl+,) and search for the extension name.
Alternatively, edit settings.json directly for more control. Open it via Ctrl+Shift+P → "Preferences: Open Settings (JSON)."
Extension settings use a namespace format like extensionName.settingName. For example, ESLint settings begin with eslint. in the configuration file.
Installing Specific Extension Versions
Sometimes you need an older extension version due to compatibility issues. Cursor lets you install specific versions when needed.
To install a previous version:
- Find the extension in the Extensions panel
- Click the gear icon next to Install/Uninstall
- Select "Install Another Version"
- Choose from the list of available versions
This feature proves essential when a new extension update breaks functionality or introduces bugs. Pick a version released one to two months prior for best stability.
Workspace Extension Recommendations
Share recommended Cursor extensions with your team by creating an extensions.json file.
Create the file at .vscode/extensions.json:
json
{
  "recommendations": [
    "anysphere.python",
    "dbaeumer.vscode-eslint",
    "esbenp.prettier-vscode",
    "eamodio.gitlens"
  ],
  "unwantedRecommendations": [
    "github.copilot"
  ]
}
When team members open this workspace, Cursor suggests installing the recommended extensions. The unwantedRecommendations array prevents suggestions for conflicting extensions.
Enterprise Extension Management
Organizations on Cursor's Enterprise plan can control which Cursor extensions team members install. This prevents security risks and ensures compliance.
Configure allowed extensions via team settings:
Administrators can create an allowlist of approved publishers. For example:
json
{
  "extensions.allowed": {
    "anysphere": true,
    "github": true,
    "dbaeumer": true,
    "esbenp": true
  }
}
This configuration allows only extensions from specified publishers. Team members cannot install extensions from unlisted publishers.
Additional Enterprise controls in Cursor 3.0:
- Third-party plugin imports default to OFF (admins must enable explicitly)
- Audit logs track extension installations and usage
- Team-level settings override individual preferences
- Private plugin marketplaces for internal tools
How to Sync Cursor Extensions Across Multiple Devices
Unlike VS Code, Cursor lacks built-in settings sync for Cursor extensions. However, several workarounds exist to maintain consistent setups across machines. Here are the best methods to sync Cursor extensions and settings.
Option 1: The Dotfiles Method
Developers often use dotfiles repositories to sync configurations. This method gives you full control and version history.
Setting up the repository:
- Create a new Git repository for your dotfiles
- Add your Cursor settings.json to the repo
- Use a tool like
stowto create symlinks
Example structure for macOS:
dotfiles/
└── cursor/
    └── Library/
        └── Application Support/
            └── Cursor/
                └── User/
                    └── settings.json
Syncing extensions:
Create a script that uses CLI commands to export and import your extension list:
bash
# Export extensions
cursor --list-extensions > ~/.dotfiles/cursor-extensions.txt

# Import extensions on new machine
cat ~/.dotfiles/cursor-extensions.txt | xargs -L 1 cursor --install-extension
Option 2: Profile Export and Import
Cursor supports VS Code-style profile management.
To export:
- Press Ctrl+Shift+P
- Type "Profiles: Export Profile"
- Save the .code-profile file
To import:
- Copy the profile file to your new machine
- Press Ctrl+Shift+P
- Type "Profiles: Import Profile"
- Select your file
This method transfers settings, keybindings, and extension lists together.
Option 3: Third-Party Sync Extensions
Several extensions provide automatic syncing via GitHub Gists.
The "Sync Everything" extension offers straightforward setup. After configuring your GitHub token, it automatically syncs settings, keybindings, and extensions across devices.
The "cursor-settings-sync" extension provides similar functionality with additional options for selective syncing.
Option 4: Manual File Copy
For a simple approach, copy your configuration files directly.
Files to copy:
settings.json- Your editor preferenceskeybindings.json- Custom keyboard shortcutsextensions.json- Extension recommendations
Use the platform-specific paths listed in the reference section below.
Configuring .cursorrules: The Most Powerful "Extension"
Many developers overlook Cursor's most powerful configuration option. The .cursorrules file isn't technically an extension, but it dramatically changes how Cursor's AI behaves in your project.
What is .cursorrules?
A .cursorrules file acts like a system prompt for Cursor's AI. Place it in your project's root directory, and the AI follows your instructions when generating or modifying code.
Think of it as training a specialized agent for your specific codebase. Instead of getting generic code suggestions, you get output tailored to your team's standards.
Creating Your First .cursorrules File
Create a file named .cursorrules in your project root with instructions like this:
You are an expert React developer working on a Next.js 14 application.

Guidelines:
- Always use TypeScript with strict mode
- Use Tailwind CSS for all styling
- Prefer functional components with hooks over class components
- Use the App Router (app/), not the Pages Router
- For data fetching, use Server Components when possible
- Write unit tests using Jest and React Testing Library

Code style:
- Use single quotes for strings
- Use 2-space indentation
- Add JSDoc comments for exported functions
Why .cursorrules Matters for Extension Users
When you migrate Cursor extensions from VS Code, the AI doesn't automatically understand your project conventions. A .cursorrules file bridges this gap.
For example, if you use ESLint with specific rules, tell Cursor about them in .cursorrules. The AI will generate code that passes your linter on the first try.
Sharing .cursorrules Across Your Team
Add .cursorrules to version control so every team member benefits. When new developers join, they immediately get AI assistance tuned to your standards.
You can also include .cursorrules in your dotfiles repository alongside your Cursor extensions and settings. This ensures consistent AI behavior across all your machines.
Best Cursor Extensions to Install: Essential Recommendations
Cursor includes powerful AI features built-in. Therefore, your Cursor extensions needs differ from a standard VS Code setup. Here's guidance on the best extensions for Cursor and which ones to avoid.
Language Support Extensions
Python: Install either anysphere.python or use Cursor's built-in Pyright support. The Anysphere version provides full IntelliSense and debugging.
JavaScript/TypeScript: Cursor offers excellent built-in support. You typically don't need additional extensions for basic JS/TS development.
ESLint: Install this extension to enable Cursor's AI-powered lint fixing. The agent mode reads linter output and automatically fixes issues.
C# Development: Microsoft's C# Dev Kit is blocked in Cursor due to licensing. Instead, install ReSharper (released for Cursor in March 2026) or use OmniSharp-based extensions from OpenVSX. ReSharper brings JetBrains' code analysis directly to Cursor.
Git and Version Control
GitLens: This extension adds blame annotations, history exploration, and powerful comparison tools. It works perfectly alongside Cursor's built-in Git features.
GitHub Pull Requests: Manage pull requests directly within your editor. Create, review, and merge PRs without switching to a browser.
Productivity Boosters
TODO Highlight: Makes your TODO, FIXME, and NOTE comments visually prominent. You'll never forget a task buried in code.
Path Intellisense: Autocompletes file paths as you type. This feature saves time and prevents typos in import statements.
Auto Rename Tag: Automatically renames paired HTML/JSX tags. Change an opening tag, and the closing tag updates instantly.
Project Manager: Essential for multi-repository workflows in Cursor 3.0. This extension lets you quickly switch between projects and organize workspaces efficiently.
npm Intellisense: Autocompletes npm module names in import statements. Particularly useful when working with large JavaScript projects.
Markdown All in One: Helpful for writing .cursorrules files and documentation. Provides shortcuts, preview, and auto-completion for markdown.
Code Quality Tools
Prettier: Formats code consistently across your team. Configure it to run on save for automatic formatting.
Error Lens: Displays errors and warnings inline, right where they occur. You'll catch problems without checking the Problems panel.
Code Spell Checker: Catches typos in comments, strings, and identifiers. Programmers write plenty of English alongside code.
What NOT to Install in Cursor
GitHub Copilot: This extension conflicts with Cursor's built-in AI features. Cursor's AI provides similar functionality with deeper editor integration.
Other AI autocomplete extensions: Tools like Tabnine or Codeium create conflicts and redundancy. Cursor's AI handles these tasks natively.
Settings Sync (VS Code version): This extension doesn't work properly in Cursor. Use the alternatives described in the syncing section instead.
Microsoft C# Dev Kit: This proprietary extension is blocked from running in non-Microsoft editors. Use ReSharper or OmniSharp alternatives instead.
Recommended Cursor Extensions by Development Type
For web development projects, consider installing Prettier, ESLint, and Auto Rename Tag. These three Cursor extensions handle most formatting and code quality needs for frontend work.
For backend development in Python, the Anysphere Python extension provides essential support. Combine it with Pylint or Ruff for comprehensive linting capabilities.
For DevOps workflows, Docker and Kubernetes extensions remain useful in Cursor. They integrate well with the editor's AI features for container configuration and deployment scripts.
For data science work, consider Jupyter notebook support and Rainbow CSV. These extensions complement Cursor's AI when working with datasets and notebooks.
For .NET development, ReSharper for Cursor brings professional-grade refactoring and code analysis. It's the best alternative to Microsoft's blocked C# Dev Kit.
Troubleshooting: Cursor Extensions Not Working and Common Fixes
Even with careful setup, problems occasionally arise with Cursor extensions. Here's how to diagnose and fix the most common extension issues you might encounter.
Issue 1: Extensions Not Appearing After Import
Symptoms: You imported from VS Code, but extensions are missing from the installed list.
Causes: The extension isn't available on OpenVSX, or the import process encountered an error.
Solutions:
- Search for the extension manually in the marketplace
- Install via VSIX if not in marketplace
- Check if an Anysphere alternative exists
- Restart Cursor and check again
Issue 2: Extension Not Found in Marketplace
Symptoms: Searching returns no results for an extension you know exists.
Causes: The extension isn't published to OpenVSX, or it's Microsoft-proprietary.
Solutions:
- Install via VSIX from GitHub
- Use the Anysphere-published alternative
- Check the OpenVSX Registry directly at open-vsx.org
- For Microsoft extensions, consider alternatives with similar functionality
Issue 3: Extension Installed But Not Working
Symptoms: The extension appears in your installed list but doesn't function.
Causes: API incompatibility, missing dependencies, or activation failure.
Solutions:
- Check the Developer Console for errors (Help → Toggle Developer Tools)
- Disable and re-enable the extension
- Uninstall and reinstall completely
- Check the extension's GitHub issues for known problems
- Verify you're using a compatible Cursor version
Issue 4: "Error While Fetching Extensions" Message
Symptoms: The marketplace shows an error instead of extension listings.
Causes: Network connectivity problems or proxy configuration issues.
Solutions:
- Check your internet connection
- Configure proxy settings in Cursor if required
- Try again after a few minutes (temporary server issues)
- Clear Cursor's cache and restart
Issue 5: Extensions Causing Performance Problems
Symptoms: Cursor runs slowly or uses excessive memory.
Causes: Heavy extensions, too many extensions, or extension conflicts.
Solutions:
- Launch with
cursor --disable-extensionsto confirm extensions are the cause - Re-enable extensions one by one to identify the culprit
- Disable extensions you don't actively use
- Check extension settings for resource-intensive options
Issue 6: Extension Settings Not Transferred
Symptoms: Your extension works but uses default settings instead of your configuration.
Causes: Settings live in settings.json, separate from the extension itself.
Solutions:
- Copy settings.json from your old installation
- Export and import a profile
- Manually configure the extension settings
Resetting Cursor Extensions Data
When troubleshooting Cursor extensions fails, a clean slate sometimes helps. Use these commands to reset extension data completely:
macOS/Linux:
bash
rm -rf ~/.cursor/extensions/
Windows (PowerShell):
powershell
Remove-Item -Recurse -Force "$env:APPDATA\Cursor\extensions"
After deletion, restart Cursor and reinstall only the extensions you need.
Cursor Extensions File Locations: Complete Platform Reference
Knowing where Cursor stores extension files helps with troubleshooting, backup, and manual configuration. Here's the complete reference for all platforms showing where your Cursor extensions and settings live.
Windows Locations
File/FolderPathExtensions%APPDATA%\Cursor\extensions\Settings%APPDATA%\Cursor\User\settings.jsonKeybindings%APPDATA%\Cursor\User\keybindings.jsonSnippets%APPDATA%\Cursor\User\snippets\Extension metadata%APPDATA%\Cursor\extensions\extensions.json
macOS Locations
File/FolderPathExtensions~/.cursor/extensions/Settings~/Library/Application Support/Cursor/User/settings.jsonKeybindings~/Library/Application Support/Cursor/User/keybindings.jsonSnippets~/Library/Application Support/Cursor/User/snippets/Extension metadata~/.cursor/extensions/extensions.json
Linux Locations
File/FolderPathExtensions~/.cursor/extensions/Settings~/.config/Cursor/User/settings.jsonKeybindings~/.config/Cursor/User/keybindings.jsonSnippets~/.config/Cursor/User/snippets/Extension metadata~/.cursor/extensions/extensions.json
Frequently Asked Questions About Cursor Extensions
Here are answers to the most common questions developers ask about managing Cursor extensions, importing from VS Code, and troubleshooting issues.
Can I use all VS Code extensions in Cursor?
Approximately 90% of VS Code extensions work as Cursor extensions without modification. However, Microsoft-proprietary extensions like certain Azure tools may not function due to licensing restrictions. Most popular Cursor extensions for languages, linting, and Git work perfectly.
Why can't I find some extensions in Cursor's marketplace?
Cursor uses the OpenVSX Registry instead of the VS Code Marketplace. Some extensions haven't been published to OpenVSX, and Microsoft-proprietary extensions are unavailable. You can often install these via VSIX files from GitHub.
How do I import my VS Code extensions to Cursor?
Open Cursor Settings with Cmd/Ctrl+Shift+J, navigate to General → Account, and click "Import from VS Code." This one-click method transfers your extensions, settings, and keybindings automatically.
Where does Cursor store extensions on my computer?
On Windows, extensions live in %APPDATA%\Cursor\extensions\. On macOS and Linux, you'll find them in ~/.cursor/extensions/. Settings files have different locations depending on your operating system.
How do I install a VSIX file in Cursor?
Press Ctrl+Shift+P to open the Command Palette, type "Extensions: Install from VSIX," and select the command. Then navigate to your .vsix file and click Install. Alternatively, drag the file into the Extensions panel.
Why aren't my extensions working after a Cursor update?
Updates sometimes introduce compatibility issues. Try disabling and re-enabling the affected extension. If that fails, uninstall and reinstall it. Check the extension's GitHub page for known compatibility issues with recent Cursor versions.
Should I install GitHub Copilot in Cursor?
No. GitHub Copilot conflicts with Cursor's built-in AI features. Cursor provides AI-powered code completion, chat, and editing natively. Installing Copilot creates redundancy and potential conflicts.
How do I sync my Cursor extensions across multiple computers?
Since Cursor lacks built-in sync for Cursor extensions, use alternative methods. Export your profile via Command Palette, use a dotfiles repository with symlinks, or install a third-party sync extension like "Sync Everything" that uses GitHub Gists.
What's the difference between VS Code Marketplace and OpenVSX?
The VS Code Marketplace belongs to Microsoft and restricts access to Microsoft products only. OpenVSX is an open alternative managed by the Eclipse Foundation. Cursor uses OpenVSX, which has most popular extensions but fewer total options.
How do I disable all extensions for troubleshooting?
Launch Cursor from the command line with cursor --disable-extensions. This starts the editor without loading any extensions, helping you determine if an extension causes problems you're experiencing.
Why doesn't Microsoft's C# Dev Kit work in Cursor?
Microsoft's C# Dev Kit is proprietary and blocked from running in non-Microsoft editors. For C# development in Cursor, install JetBrains' ReSharper extension (released March 2026) or use OmniSharp-based extensions available on OpenVSX.
What is a .cursorrules file and should I use one?
A .cursorrules file configures how Cursor's AI behaves in your project. Place it in your project root with instructions about coding standards, frameworks, and preferences. The AI follows these rules when generating code. Most teams benefit from using one.
How do I install an older version of an extension?
Click the gear icon next to any extension in the Extensions panel. Select "Install Another Version" and choose from the available versions. This helps when a recent update breaks compatibility with your workflow.
Conclusion: Mastering Cursor Extensions for Maximum Productivity
Managing Cursor extensions becomes straightforward once you understand the available methods. You can use one-click import for migration, the Cursor extension marketplace for discovery, VSIX files for unavailable extensions, and CLI commands for automation.
The OpenVSX transition in 2025 created some friction for Cursor extensions, but workarounds exist for most situations. Anysphere-published extensions cover many popular tools, and VSIX installation handles the rest.
For best results, keep your Cursor extensions list minimal. Each extension adds memory overhead and potential conflicts. Cursor's built-in AI features replace many extensions you might have used in VS Code, so evaluate whether you truly need each one.
If you work across multiple machines, set up a sync solution for your Cursor extensions early. The dotfiles method offers the most control, while profile export provides the quickest setup for occasional needs.
When troubleshooting Cursor extensions not working, remember the simple steps. Disable extensions to isolate problems, check the Developer Console for errors, and don't hesitate to uninstall and reinstall when needed.
Finally, stay updated on Cursor's evolving extension ecosystem. The Cursor extension marketplace and plugin system continue to grow, bringing new integrations and capabilities regularly.
Ready to Optimize Your Development Environment?
RapidDev helps development teams maximize productivity with AI-powered tools like Cursor. Choosing the right extensions and configuration can significantly impact your team's velocity.
Our services include comprehensive AI code editor setup and configuration tailored to your technology stack. We provide team onboarding programs that accelerate Cursor adoption and reduce the learning curve for developers at all skill levels.
Additionally, RapidDev offers custom extension recommendations based on your specific workflows and development practices. We help standardize development environments across your organization, ensuring consistency and reducing "works on my machine" problems.
Don't let tool configuration slow down your team. RapidDev's expertise with AI development tools helps you achieve productivity gains faster while avoiding common pitfalls.
Contact RapidDev today for a free consultation on optimizing your Cursor setup and development workflow.
Ready to kickstart your app's development?
Connect with our team to book a free consultation. We’ll discuss your project and provide a custom quote at no cost!